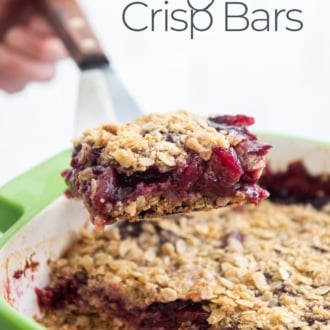
Crumbly Cherry Crisp Bars w/ Homemade Cherry Filling

When fresh cherries are in season, one of the first things we make are these crumbly cherry crisp bars. It’s a treat to make homemade cherry filling for these cherry bars. The natural sweetness of fresh cherries are delicious and perfect to enjoy this special seasonal fruit. Hope you enjoy our cherry bars recipe.

Cherry Crisp Bars: Crumbly and Delicious
Our recipe for cherry bars are inspired from our love of berry crisps. The base crust on our bars is unlike other bar recipes. The base is crumbly because it’s the same ingredients as the topping. We didn’t want to have a hard, firm shortbread style base. If you need to use a fork then that’s ok. We’d rather have the base more crumbly than hard.
Video: Easy Cherry Crisp Bars Recipe
How To Make Our Cherry Crisp Bars (Tips)
- We have a recipe for homemade cherry filling. If you don’t have fresh cherries, you can use canned cherry filling or pie filling. One of our favorite store bought cherry pie fillings is from Red Hills Dessert Company.
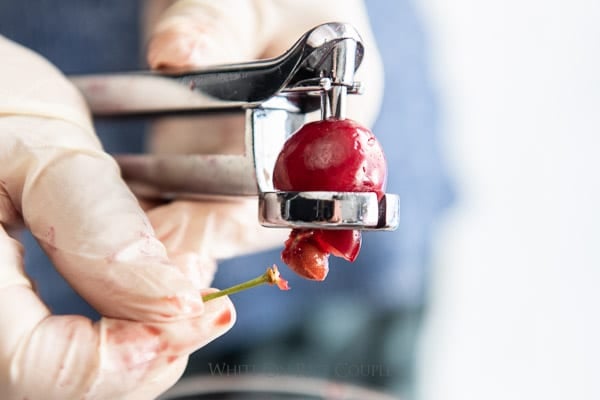
- This cherry pitter from OXO is great for the ease of use and reducing splattering. It is our favorite pitter. Works great for olives too.
- Cherry pitting tip: Push the pit out toward the stem side of the cherry. It will usually release much easier and cling the the cherry less in that direction. Plus if the stem is still attached, it will often take the stem with it.
- Stain warning: if you’re using fresh cherries in the cherry pitter, the juice might splash everywhere and get messy. Cherry juice stains! So wear plastic gloves and cover the area around your kitchen. Wearing an old apron or a shirt that you don’t care about is a good idea. 🙂
- Make sure to press firmly down on the crust base for a more “bar” like firmness that allows you hold the bar. Otherwise, a crumbly textured base is what you’ll get and it’s a great texture and easy to bite into.
- Allow the crisp to completely cool before cutting. Chilling it makes it even easier.
- All recipe details are in the recipe box below.

Can you freeze these bars?
Yes, freezing these Cherry bars are possible. But know that when they thaw, the texture becomes much more mushy and crumbly. The thawing frozen cherries releases some moisture. It’s best to just eat the whole batch when they’re fresh or share them with someone.

Cherry Crisp Bars
Ingredients
Cherry Filling
- 1.5 pounds (680 g) fresh cherries , un-pitted (about 5 cups) or 4 cups pitted
- 1 cup (240 ml) water
- 1/4 cup (50 g) sugar , or more to personal taste
- 1 Tablespoon (15 ml) fresh lemon juice
Slurry For Filling
- 2 Tablespoons (30 ml) water
- 2 Tablespoons (30 ml) cornstarch
Crust Ingredients
- 1 cup (125 g) flour
- 1/2 cup (110 g) packed brown sugar
- 1/4 teaspoon (1.25 ml) Kosher salt
- 1/4 teaspoon (1.25 ml) Baking Soda
- 3/4 cup (170 g) cold unsalted butter (1 1/2 sticks) , cut into small cubes
- 1 cup (80 g) old fashioned oats
Equipment
- Pastry Cutter optional
Instructions
Make the Cherry Filling
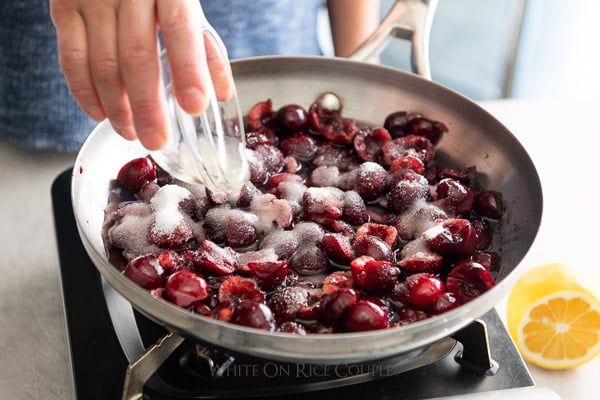
- Pit and split the cherries in half.

- In saucepan combine cherries, 1 cup water, sugar, and fresh lemon juice.
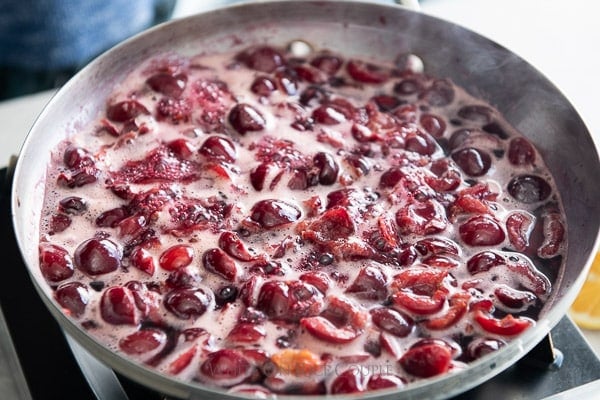
- Bring to a boil then reduce heat to low simmer. Cook for about 5-10 minutes or until the cherries are soft.
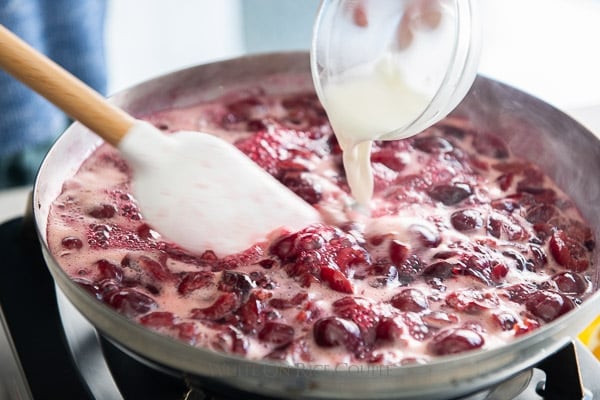
- Combine water and cornstarch in small bowl, stir to remove all lumps. Pour into the hot cherry mix and stir briskly to make sure no lumps form.
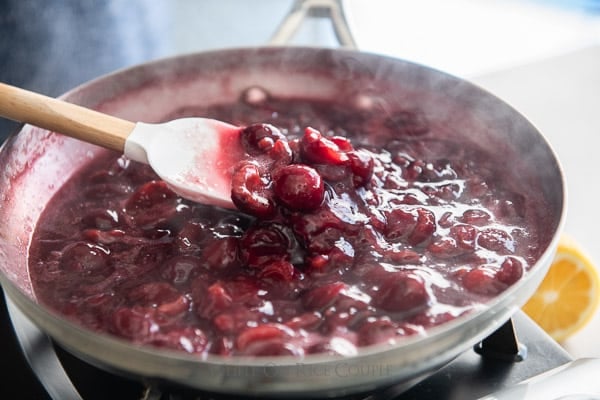
- Continue cooking and once filling starts to thicken, about 1-2 minutes, then remove pan from heat. Set aside and allow to cool completely.
Make The Bars
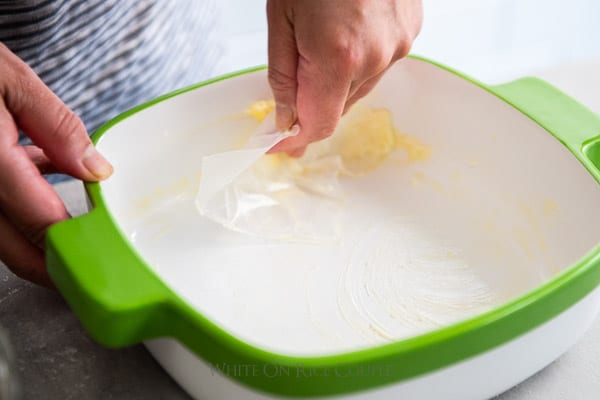
- Preheat oven to 350°F/175°C. Butter an 8”x8” or similar baking dish.
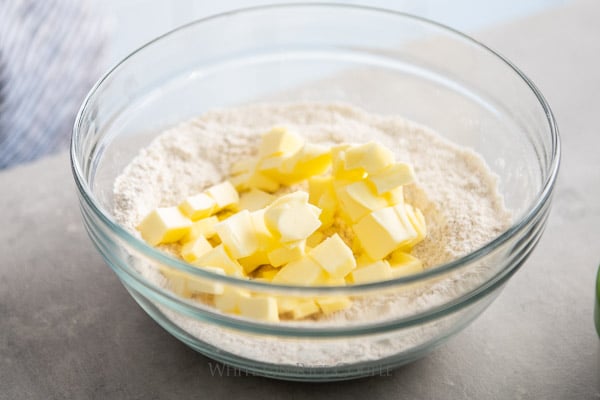
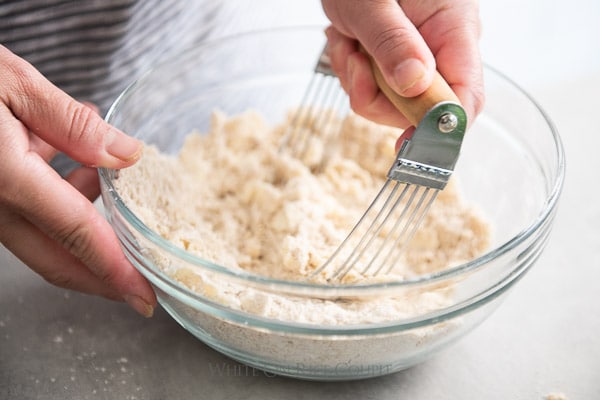
- In a bowl, whisk together the flour, brown sugar, salt, and baking soda. Add the butter pieces.
- Pinch in the butter pieces into the flour mixture (or cut them into the flour with a pastry cutter), until it resembles coarse sand.
- Pinch in the oats until well combined. Set aside to chill if not making the bars right away.
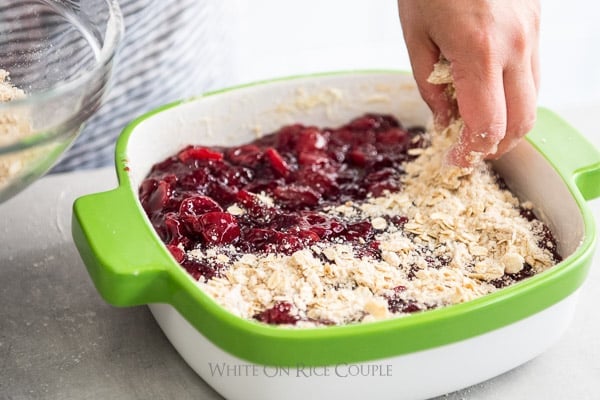
- Press 2/3rds of the crust mixture evenly into the bottom of the prepared baking dish (if using a tart pan, press the crust mixture up the sides too).
- Spread the cherry filling over the crust bottom. Sprinkle the remaining crust over the top of the cherry filling.
- Bake for 50-65 minutes or until the crust is golden brown. Allow to cool completely. Slightly chilled is best. Then slice and serve. Store in the refrigerator.


These cherry bars were just the right amount of sweet. Absolutely loved it. And the whole family loved it too. Thanks for the recipe.
These were so yummy!!!! I reduced the butter a little to just over a stick bc I’m trying to be more health conscious and it came out so amazing. I cooked mine for 60 minutes which I think was perfect. Has the perfect amount of sugar for it to not be overly sweet and the cherry stuff was so good I had to hold myself back from eating it before it put it in the dish lollll
Wow, this recipe was absolutely amazing. The cherries were really juicy and the sweetness level was just perfect.