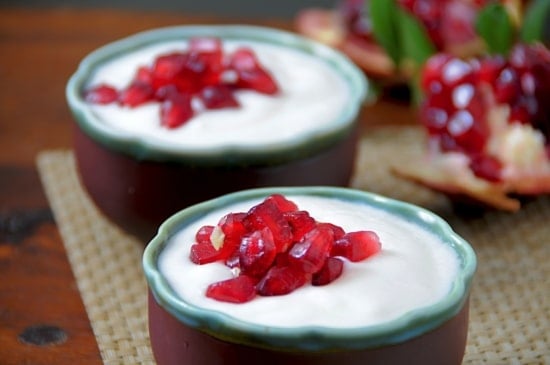
Vietnamese Yogurt
Lucky for us, nearly every grocer, banh mi shop, and patisserie in Little Saigon make or sell Vietnamese yogurt just for us so we can get our regular fix. We normally find it in clear plastic cups and the prices are very affordable. OK, maybe they don’t stock it just for us, but we definitely help keep their supplies fresh by buying super habitually. Then something happened…. We made a batch at home. This Vietnamese yogurt recipe was one of our first recipe posts back in 2008. An oldie but goodie. It’s fun to see how our photography and garden has changed over the years!
Popularity of Yogurt
We love the current food fad of the Red Mango-Pinkberry-Yogurtland-a million other knock off names. We especially love the newer style of shops that have a plethora of flavors and are 100% self-serve. Mix ’em as you like them, top it as you want and have as much or little as you like. No paying too much for a penny pinching owner to ration out a few meager berries to top your yogurt. These are our favorite places for a quick afternoon sweet.
It is no surprise to see these yogurt shops popping up all over the place in Little Saigon. The Vietnamese have been making their non-frozen, Vietnamese yogurt version of this yogurt craze for quite some time. The first introduction of yogurt to Viet-Nam came from the influence of French colonization. Now, Vietnamese yogurt is not only a tradition in the mother country, but has gained popularity in America as well. That slight sweetness combined with the bit of tang makes an incredible combination. It’s a hard toss up to say whether we love this yogurt or a great Greek yogurt topped with Tupelo honey better.
What is Vietnamese Yogurt?
Vietnamese yogurt (da ua or sua chua) is smooth and touched with the sweetness of sweetened condensed milk. That slight touch of tartness is delicate, but still silky with a creamy texture. Often eaten more as a dessert and snack in VietNam, this yogurt is embraced by many others as the perfect breakfast yogurt. Topped with some fresh fruit, and even some crunchy granola, Vietnamese yogurt is a nice variety to add to your morning yogurt regime.
Mixed amongst all of Diane’s collective childhood slave kitchen days, was a recollection of Mom making enormous batches of Vietnamese yogurt. Diane’s mom would save a big box of baby food jars and use those as the containers to store the Vietnamese yogurt. If you are making your own yogurt, those clear plastic cups or even small mason jars will also work just fine. In an effort to prevent withdrawal fits when we are too lazy to go out and buy yogurt (you know, the days when we just stay home & make our own damn coffee), we figured it would be a good idea to have some Vietnamese yogurt always in stock in the fridge.
So, you may wonder, is it hard to make? Hell no. Vietnamese yogurt is extremely easy to make! If it were any easier, it would fall into the boiling water category of difficulty. We have to send out our apologies to all of our favorite banh mi shops, because there is one less fix that we have to get from you. Fortunately there is plenty else that keeps us coming through your doors. And for the rest of you, here you go, yogurt brethren, a super simple recipe for some damn good yogurt. – Todd

Vietnamese Yogurt Recipe
Ingredients
- 2/3 cup (200 g) Sweetened Condensed Milk (Longevity or Black & White are our favorite brands)
- 1 1/4 cups (300 ml) Water (near boiling)
- 1 1/2 cups (360 ml) Milk (we prefer whole milk)
- 1 1/2 cups (360 ml) Plain Yogurt (or Vietnamese yogurt if you can get it)
Instructions
- Pour the sweetened condensed milk into a bowl and add the hot water. Whisk until homogeneous. Pour milk into bowl and mix, then add yogurt and gently whisk until everything is smooth.
- Pour the mixture into the containers you will store it in. (Small plastic containers, recycled baby food jars, small canning jars, etc...)
- In a wide bottomed pot that is taller than your yogurt containers, make a bath for the containers: Heat up enough water to a near boil that it will come most of the way up the sides of your yogurt containers when they are immersed in the bath. In another pot or tea kettle, heat up additional water.
- After water is hot, turn off heat and place filled yogurt containers into bath. Pour in additional water until water level reaches nearly the top of yogurt containers. (Hint: Use a funnel to pour the water into the pot so no water splashes into the yogurt containers.)
- Place a towel over pot, being careful not to let it droop into yogurt containers and let yogurt set in the water bath. After the water has cooled completely (@ 4-5 hrs total bathing time) the yogurt should be fairly set (it will thicken a bit more when refrigerated, but not much.) Remove from bath, put lids on jars and store in fridge until ready to serve.


